Nail art has become increasingly popular in recent years. Women love to personalize their nails with designs that range from simple stripes and dots to more elaborate optical illusions and animal print nail art. While it might look complicated and time-consuming, there are lots of easy ways to do your own nail art at home.
These simple tutorials provided by professional nail artist Chaya Shurkin will get you started with some basic nail art techniques. From there, you can experiment with different colors, patterns, and textures to create a variety of designs that suit your style. Whether you’re just dipping your toes into the world of DIY manicures or want to expand your skill set, these do-at-home nail art designs for beginners are for you! Check them out below, along with tips on how you can recreate them in no time at all.
Simple Nail Art Ideas for Beginners
If you’re just getting started with your first do-at-home manicure, you might want to start with something simple. There are endless nail art ideas out there, so you don’t have to get overwhelmed by all the options.
Below, Chaya Shurkin shares some of the easiest ways to try your first DIY manicure.
– Classic French Manicure – A classic French manicure features a white polish with a painted tip. You can add your own creative twist by using a bold colour on the tips instead of painting them white.
– Half Moon Nail Art – This nail art design uses gold and silver to create a half moon shape on the nails. The colours are very versatile and can be worn year-round.
– Swirl Nail Art – This nail art design is perfect for beginners as it only requires a single nail art brush and one colour. All you have to do is use the brush to create a swirl pattern on each nail.
– Square Manicure – This nail art design is super easy to do at home. All you have to do is paint your nails the colour of your choice and use a nail art brush to create a pattern in the shape of a square.
– Marble Nails Design – This nail art design is all about texture. You can do this design with a white or pale pink polish as the base coat, and then use a nail art sponge to create a textured marble design on your nails.
Half Moon Nail Art
This nail art design uses gold and silver to create a half moon shape on the nails. The colours are very versatile and can be worn year-round. To do this design, you will first have to apply a base coat to protect your nails. Once that is dry, use a nail art brush to apply a metallic silver colour to half of each nail. Next, Chaya Shurkin explains, apply a metallic gold colour to the other half of each nail. Finally, apply a top coat to seal in the design. The designs in this article are great for those just starting to experiment with DIY manicures. They’re simple enough to create in just a few minutes and make for a great look that you can wear for any occasion.
Swirl Nail Art
This nail art design is perfect for beginners as it only requires a single nail art brush and one colour. All you have to do is use the brush to create a swirl pattern on each nail. You can do this with any colour you like, but we recommend a shade with a bit of sparkle or shimmer. We love this light blue shade from Essie. Once you’re done painting your nails blue, take the nail art brush and swirl the colour around in a circular motion. You can use any pattern you like, but Jersey City nail-artist Chaya Shurkin suggests trying out a few swirl designs to see which one you like best. This is a great do-at-home nail art design if you want to do something fun but simple.
Square Manicure
This nail art design is super easy to do at home. All you have to do is paint your nails the colour of your choice and use a nail art brush to create a pattern in the shape of a square. You can do this on all 10 nails or mix and match the design with other nail art designs. If you want to do a different design on each nail, you can use two or three colours to create a unique look. We love the look of this easy and classic design. It’s simple enough for beginners, but it also makes for a great look that you can wear year-round.
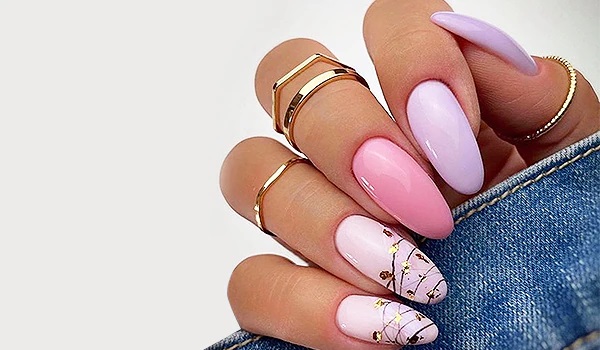
Marble Nails Design
This nail art design is all about texture. You can do this design with a white or pale pink polish as the base coat, and then use a nail art sponge to create a textured marble design on your nails. To do this, start by applying the white or pink polish to your nails and letting it dry. If you’re using the white polish, make sure you seal it with a top coat so that the nail art stands out even more. Once you’ve applied the polish, use a nail art sponge to create the marble design. You can use any design you like, but we suggest trying out the classic diagonal pattern.
Conclusion
Nail art is a fun way to express yourself and show off your creativity. These are some of the easiest ways to try your first DIY manicure. There are endless nail art ideas out there, so you don’t have to get overwhelmed by all the options. These are some of the simplest designs, they’re perfect for beginners. From there, you can experiment with different colours, patterns, and textures to create a variety of designs that suit your style. Whether you’re just dipping your toes into the world of DIY manicures or want to expand your skill set, these do-at-home nail art designs are for you!